Friday, July 23, 2010

Handmade Summer Flower Arrangement


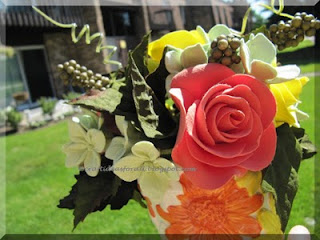
Usually I need some inspiration or a reason to create something. I have been thinking of giving something handmade to my sister-in-law since long, but have not been able to do so due to some reason or the other. During the last long weekend when my sister -in-law and her family made a last minute plan to visit us, I thought what better occasion to give a handmade heartfelt creation.Like almost most of my creations this is also one of the creations which I created keeping the receiver and the occasion in mind. Since their marriage anniversary was also there in a couple of weeks I decided making a beautiful clay flower arrangement in bright colors to brighten their day. I decided on rose and hydrangeas as they depict the long lasting love and friendship which is the key to a happy marriage.


Well, time was a limitation this time too but since I had to do it, I had to find a way to do it. Clay flowers do take time and skill to create and this is one craft you cannot sit and do in one go. It does take time and I used any spare time I got during the day and the night.
For this lovely arrangement

Supplies used :
-Ceramic pot
-Deco Clay : white, red, yellow, green
-Foliage
-Wire
-Floral Tape
-Floral foam

Please refer previous posts for the step by step tutorial for the technique used to create rose.Hydrangeas are used as filler flowers along with contrasting foliage. The different shades shown in the flowers are achieved by mixing the basic colors of the deco clay (the japanese air dry clay).
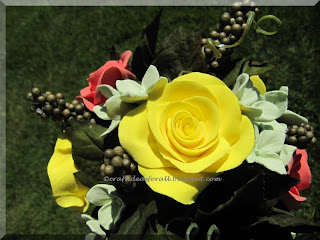


The above pictures show the flower arrangement from various angles and close up too.
I am very pleased with the result and would love to know your opinion too.


p.s.: I am glad that my brother-in-law and sis-in-law also liked it along with my hubby. My hubby was there all along supporting me especially during the last phase of this project. Lucky me.

Saturday, July 10, 2010

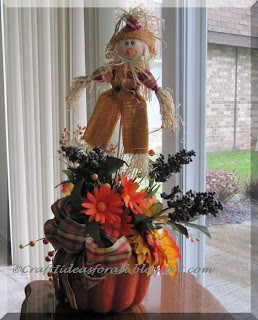
Pumpkin Craft for Halloween Decorations


In the spirit of Halloween here comes the most awaited Pumpkin Craft. I have made it this year to celebrate the festivities in my own way.It can be used as a centerpiece of your Thanksgiving table and will also make a great hostess gift for dinner invitations.

This fabulous craft is really easy to make and you can have multiple variations with the same supplies.Following supplies are required for the project:
- Craft Pumpkin - Medium size
- 2" wide Ribbon -3 feet your choice of Halloween themed colors
- Floral Wire
- Floral Tape
- Maple leaves bush -12-15 medium sized leaves in shades of Halloween themed colors like Orange, Green and Brown with glitter.
- Duplex paper - Orange color
- Three varieties of Halloween themed colored bush - Recommended varieties orange and dark brown bush, one bunch each.
- Scissors
- Craft knife
- Glue
For working with craft pumpkin the first step is to place it on a surface in such a way that it is accessible from all the sides easily and you can have a good view from all sides as well. Refer the picture and start marking on the pumpkin as to where you want to put the maple leaves.

In order to insert the maple leaves and bushes you have to prepare them. Cut them so that you have individual pieces (if you bought a creeper). Add wire to each leaf and individual piece of bush and wrap with floral tape.

Make small slits in the craft pumpkin using craft knife. Insert the leaves and bushes in the pumpkin. Secure them with glue. Also insert the flowers made out of duplex paper. You can make any kind of flowers as long as they are shades of Halloween themed colors.

If you do not want to make the flowers yourself, silk flowers of similar colors can be used to complete the arrangement.

Refer to my earlier posts to make double crepe paper flowers.
Finish the arrangement with the bow you made from the ribbon of your choice. Attaching wire to the bow makes it easy to secure in the pumpkin vase.


Tips: This arrangement can also be prepared using natural fall colored leaves. You just have to be little careful not to break them while inserting.
You can add a scarecrow to it too. Adding a crafted spider makes it little spooky too. It makes a great window display for the Halloween season.

Friday, July 9, 2010

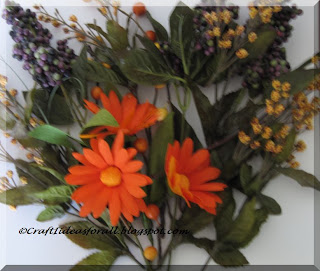
Hand tied flower arrangement as Gift box topper


The way you wrap a gift tells a lot about how lovingly the gift was given. A gift which is wrapped beautifully speaks for itself. It tells, if that much thought and effort has gone in wrapping there must be definitely something really useful and thoughtful about the gift inside too.

In the series of various different ways of wrapping different types of gift here is the one which is really close to my heart. I wrapped this gift when I was still expecting my baby boy. I really didn't know whether I will be able to go to the house warming ceremony of one of my close friend's house. I had bought the gift but had not been able to wrap it till the last minute.

I really wanted to make it extra special so I quickly thought of adding some lovely flowers to the entire gift wrapping box. These flowers can even be used in a small vase too. A bud vase will be ideal for such handtied arrangements. One more reason for adding those flowers was to add interest, uniqueness and color to the gift.

Here I have used some purple colored deco clay hydrangeas which I made myself few days back. Along with that I have added some contrasting yellow bushes and few thin grass leaves.I have handtied the flowers and bushes first and then completed it with a perfect coloured wired ribbon as a bow. I have attached this using scotch tape.


This little addition has made this gift extra special. The silver wrapping paper adds glamour and sophisitication to the gift box. Silver and gold wrapping paper in matt finish and with hint of glossy finish in way of stripes or small patterns are perfect even for formal occasions.


Happy gift wrapping.

Tips: You can use silk flowers, paper flowers or fresh flowers too if clay flowers are not available.

If you know which flower the receiver of the gift likes, using that will make it even more personalised.

See our posts on clay flowers for step-by-step instructions to make them. Click on http://craftideasforall.blogspot.com/search/label/Clay%20flowers